The VDIP1 USB host controller is a worthwhile extension module for anyone working with the Arduino microcontroller. The ability to integrate USB inputs/outputs with your Arduino microcontroller means that you can interface it with practically any USB device, creating even more exciting possibilities with Arduino. Another valuable integration feature that the module can provide is the ability to increase Arduino’s memory capacity using any USB memory drive.
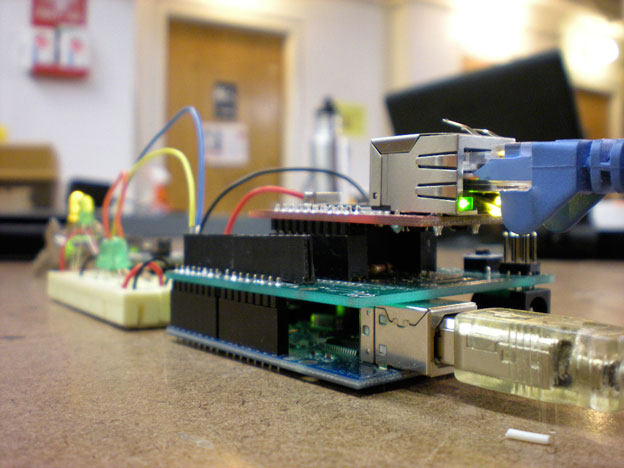
For this lab in my Networked Objects class taught by professor Robert Faludi at ITP, I was assigned to work with a USB host controller to receive and send a secret espionage message across an array of other networked devices that other students in the class were working with. Connecting the VDIP1 controller to Arduino was fairly straightforward. There were four simple connections I had to make to quickly start working with the module:
- Connect the module to power and ground on the breadboard (pins: 5V and GND).
- Connect the CTS and RTS pins to each other with a wire for flow control. (pins: A03 to A04)
- Attach the RXD and TXD pins to the RX and TX inputs onto the Arduino. (RX pin: A00, TX pin: A01)
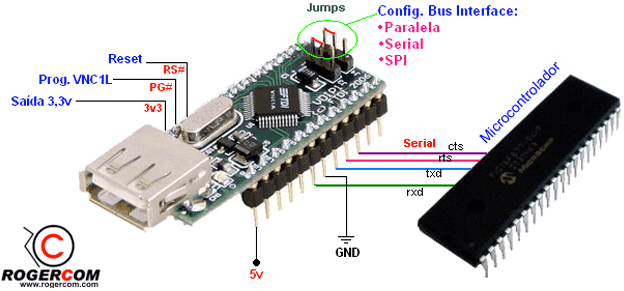
- Place the jumpers onto the configuration bus interface so that the USB host controller can handle serial communication from your Arduino. (refer to diagram below)
I found this clear semantic diagram from rogercom.com extremely helpful in helping me to get my connection to run properly:
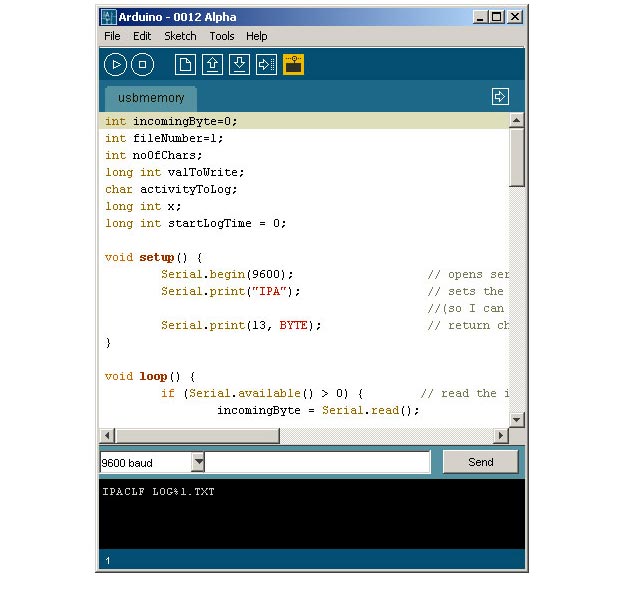
Next, I powered up the Arduino with one of the USB ports on my computer. The USB host controller’s LEDs immediately began to blink indicating that all the module’s properties were functioning properly. After a few seconds, the LED connected to LED1 was the only light that remained illuminated. To ensure that I was able to properly communicate with the VDP1 module, I established a serial connection with the COMM port that my Arduino was connected to using my telnet client (MACs: ZTerm, PCs: I recommend putty, it’s free!). Once I had a connection established, the device sent a string ‘IPA’ to my terminal window. This feedback gave me enough confidence that I would be able to send to and receive from my USB module and begin reading and writing to text files onto my USB key.
I successfully used Nick’s Arduino code to begin reading from and writing to text files with my USB key. His program functions by sending numbered commands from your serial monitor directly from the Arduino interface.
You can access the syntax and clear documentation for his program from the Arduino Playground web site.
– Jason


